Today we are sharing some advice for making clothing light up in a simple way (basically sewing in a battery powered strings of lights).
This maybe an easier method for most people than the version we explained in detail in the earlier blog about creating light up costuming using a more complicated e-textile method (literally wiring together a circuit of individual LED bulbs onto clothing). So this blog is for my friends who requested a follow-up with a way that didn't require knowledge of electrical circuits and only minimal basic sewing ability.
INDEX: choosing an item to light up / battery packs / choosing light strings / sewing them down / buying lights online

CHOOSING what to light up (CLOTHING, ACCESSORIES & FABRIC) -
Sturdier fabric is easier to work with because it can hold the weight of the lights, wires & battery. You can add lights to an old hat, vest, arm cuffs, coat lapels, disco panties, skirts, whatever is clever really.
When choosing an item of clothing to light up, avoid metallic fabric that may be conductive. If any wiring becomes exposed during wear, it will short out if it comes in contact with metal. So try to avoid hard bends in the wiring & don't tie knots or anything with the wire as that can break down the tiny copper wiring inside the insulating cover & eventually kill your lights.
Choose an accessory or piece of clothing that is made of fabric that can handle the weight of adding lights without tearing or stretching out of shape. Its a little trickier, but you add lights to weaker fabric if you are super careful about how you sew them in, AS LONG AS there is some reinforced part of the garment like a waistband or belt or something that you can attach the battery pack to.

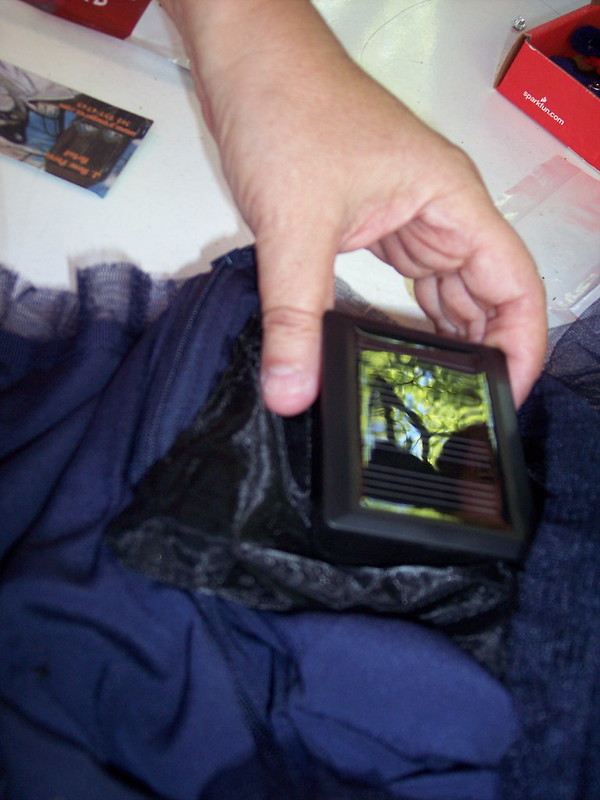
(photo caption: Sonia Santana made her tutu light up with solar powered lights by attaching the lights to the satin lining instead of the tulle. Notice the black fabric battery pocket is attached to the inside of the darker blue waistline)
BATTERY PACKS -
Be sure to consider where you are going to hide the battery pack as it is the heaviest part of the rig & you won't want it seen.Some people in the workshop built a little fabric pocket to hold the battery pack and others even utilized a pocket already on the garment. Velcro or a plastic button can be a handy way to close the pouch to keep the battery pack from falling out of the pocket or tearing the material it is attached to. gaffers tape will work, but it is cumbersome to open & close & isn't a very good long term solution to holding down the battery pack (sweat can make tape lose its stick, & taped down battery packs are challenging to change the battery in). If you make your own "power pocket" be sure to sew it into a part of the garment that can support its weight without making an unattractive sag in your outfit (waistbands are good, & hidden behind seams also works, it depends on what type of clothing you are working with.
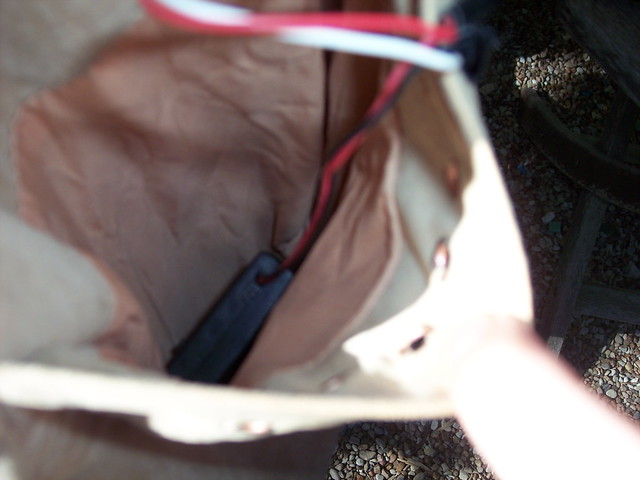
(photo caption: Brant's battery inside breast pocket of jacket)

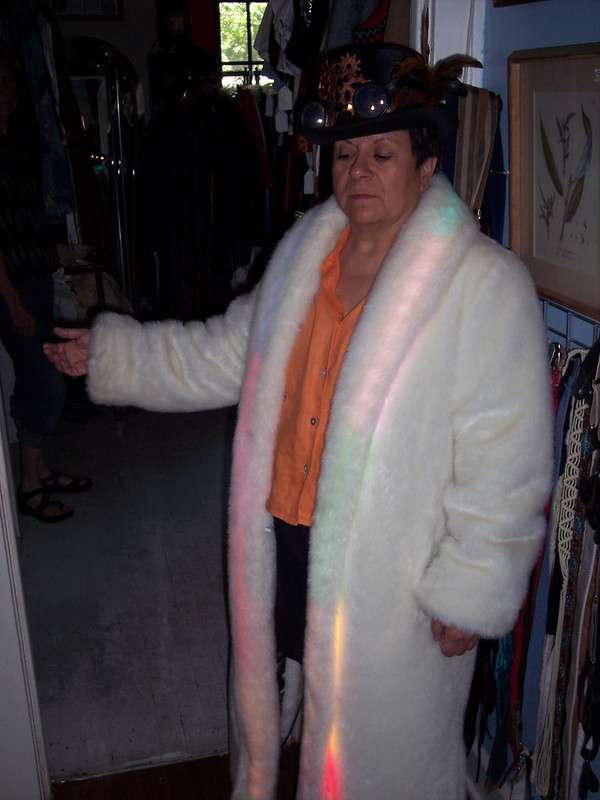
(photo caption: Brant made the jacket he is wearing with LED light up lapels)
 (photo caption: backside of Brant's label, note he chose to use hard wired LEDs instead of the simpler battery pack operated LED christmas lights)
CHOOSING LIGHTS -
In the Sources section below I list several good options for buying light strings online. Few important things to remember:
 SEWING IN LIGHTS -
Turn your garment inside out, then start with the battery pack and work your way along the light string from there. If you made or found a pocket, slip the battery pack into place. If you have a battery pack that can be sewn onto the garment and worn comfortably, that will also work. I made a little felt flap to cover the edges of the pack from my skin so I wouldn't be rubbed the wrong way during wear.
Now layout the rest of the wire so you can get an idea of what it will look like & how much the light will cover since its a lot easier to make changes to the lighting design before things start getting tacked down. if you are doing a complicated light pattern such as spirals you can temporarily set the lights in place with blue painters tape (it leaves less gum on the fabric than gaffers or duct tape). As mentioned before do not bend or pinch the wire when doing your layout because you don't want to hurt the inner conductive wires, stick to using soft curves, straight lines or loops to decorate with instead.
Once you have your design for the light string laid out you can take a needle and thread and stitch the lights into place. DO NOT PIERCE THE WIRE WITH THE NEEDLE or it will short out *kapow*. its not necessary to run a seam down the entire wire, really you are just creating support around each of the heavy lights. tack the lights onto the garment so that it can defy gravity even if you are hopping on a trampoline.
In last spring's workshop, some peoples' projects hid the wires behind lapels and hems. They created peek-a boo holes in the fabric to push the bulbs through. This allowed them to hide the wires & they just had to really tack down the lights tightly to keep the bulb in the hole exposed. Other projects sewed the wire onto linings so that the lights could be seen through a top layer of more transparent fabric. Thick monster fur can be used and the wires and lights sewn on the front side as the long tendrils of the fur hid the wires but not the light.

Okay friends, can't wait to see you light up my night. Looking forward to seeing pictures of your projects.
SOURCES (where to buy battery powered LED light strings for this kind of project)-
Best selection & prices I found (includes fairy lights, leds, el, rope lights, waterproof, submersible, fairy berries, bendable “branches”, etc):
This maybe an easier method for most people than the version we explained in detail in the earlier blog about creating light up costuming using a more complicated e-textile method (literally wiring together a circuit of individual LED bulbs onto clothing). So this blog is for my friends who requested a follow-up with a way that didn't require knowledge of electrical circuits and only minimal basic sewing ability.
INDEX: choosing an item to light up / battery packs / choosing light strings / sewing them down / buying lights online
Basically you get a string of battery powered christmas lights and attach them to your clothes.
CHOOSING what to light up (CLOTHING, ACCESSORIES & FABRIC) -
Sturdier fabric is easier to work with because it can hold the weight of the lights, wires & battery. You can add lights to an old hat, vest, arm cuffs, coat lapels, disco panties, skirts, whatever is clever really.
When choosing an item of clothing to light up, avoid metallic fabric that may be conductive. If any wiring becomes exposed during wear, it will short out if it comes in contact with metal. So try to avoid hard bends in the wiring & don't tie knots or anything with the wire as that can break down the tiny copper wiring inside the insulating cover & eventually kill your lights.
Choose an accessory or piece of clothing that is made of fabric that can handle the weight of adding lights without tearing or stretching out of shape. Its a little trickier, but you add lights to weaker fabric if you are super careful about how you sew them in, AS LONG AS there is some reinforced part of the garment like a waistband or belt or something that you can attach the battery pack to.
(photo caption: Sonia Santana made her tutu light up with solar powered lights by attaching the lights to the satin lining instead of the tulle. Notice the black fabric battery pocket is attached to the inside of the darker blue waistline)
BATTERY PACKS -
Be sure to consider where you are going to hide the battery pack as it is the heaviest part of the rig & you won't want it seen.Some people in the workshop built a little fabric pocket to hold the battery pack and others even utilized a pocket already on the garment. Velcro or a plastic button can be a handy way to close the pouch to keep the battery pack from falling out of the pocket or tearing the material it is attached to. gaffers tape will work, but it is cumbersome to open & close & isn't a very good long term solution to holding down the battery pack (sweat can make tape lose its stick, & taped down battery packs are challenging to change the battery in). If you make your own "power pocket" be sure to sew it into a part of the garment that can support its weight without making an unattractive sag in your outfit (waistbands are good, & hidden behind seams also works, it depends on what type of clothing you are working with.
(photo caption: Brant's battery inside breast pocket of jacket)
(photo caption: Brant made the jacket he is wearing with LED light up lapels)
CHOOSING LIGHTS -
In the Sources section below I list several good options for buying light strings online. Few important things to remember:
- LED lights take less energy than traditional christmas lights, which means smaller battery packs & longer lasting lights. LEDs are less hot than other kinds of bulbs as well, because you don't something to burn or melt.
- be sure the light strings you choose are not the plug in variety but BATTERY POWERED and even solar powered lights will work if they are the kind with an on/off switch & not the ones that automatically turn themselves on based on lighting around you.
- there are lots of extra fancy light options in LED battery operated varieties if you aren't satisfied with simple light strings, you can even find them in RGB color changing, moving lights, programmable lights, remote controlled, all sorts of interesting options if you take time to browse.
- consider how heavy the lights are & if your garment can handle the weight without tearing. you can cut little peek-a-boo holes to push your bulbs through if you want to hide the wires & still let your light shine.
Turn your garment inside out, then start with the battery pack and work your way along the light string from there. If you made or found a pocket, slip the battery pack into place. If you have a battery pack that can be sewn onto the garment and worn comfortably, that will also work. I made a little felt flap to cover the edges of the pack from my skin so I wouldn't be rubbed the wrong way during wear.
Now layout the rest of the wire so you can get an idea of what it will look like & how much the light will cover since its a lot easier to make changes to the lighting design before things start getting tacked down. if you are doing a complicated light pattern such as spirals you can temporarily set the lights in place with blue painters tape (it leaves less gum on the fabric than gaffers or duct tape). As mentioned before do not bend or pinch the wire when doing your layout because you don't want to hurt the inner conductive wires, stick to using soft curves, straight lines or loops to decorate with instead.
Once you have your design for the light string laid out you can take a needle and thread and stitch the lights into place. DO NOT PIERCE THE WIRE WITH THE NEEDLE or it will short out *kapow*. its not necessary to run a seam down the entire wire, really you are just creating support around each of the heavy lights. tack the lights onto the garment so that it can defy gravity even if you are hopping on a trampoline.
In last spring's workshop, some peoples' projects hid the wires behind lapels and hems. They created peek-a boo holes in the fabric to push the bulbs through. This allowed them to hide the wires & they just had to really tack down the lights tightly to keep the bulb in the hole exposed. Other projects sewed the wire onto linings so that the lights could be seen through a top layer of more transparent fabric. Thick monster fur can be used and the wires and lights sewn on the front side as the long tendrils of the fur hid the wires but not the light.
(photo caption: battery operated "fairy lights" have super small bulbs on covered silver wire)
Okay friends, can't wait to see you light up my night. Looking forward to seeing pictures of your projects.
SOURCES (where to buy battery powered LED light strings for this kind of project)-
Best selection & prices I found (includes fairy lights, leds, el, rope lights, waterproof, submersible, fairy berries, bendable “branches”, etc):
other good options can be found at:
blue fairy lights 16.5’ long with 91 LEDs
flashing white and waterproof
wide fabric ribbon with embedded LED lights (sold by the roll)

